Showing posts with label Recipes. Show all posts

Friday, July 28, 2017

Easy Avocado Dressing!

This has definitely become my go to meal this summer, a salad drizzled with a creamy and zesty avocado dressing.  It's actually quite easy and quick to make! With just a few ingredients and five minutes you can enjoy it too!


INGREDIENTS:
  • 2 Avocados
  • 1 Lime
  • 2 Garlic Cloves peeled
  • 3 Tbsp Olive Oil
  • 1/2 tsp Kosher Salt 
  • 1/2 tsp Black Pepper
  1.  In a small food processor or blender combine the garlic, avocado, lime juice, olive oil, salt and pepper. 
  2. Blend ingredients together until smooth (you may need scrape down the sides with a small spatula)
    • You can also thin down the salad dressing with a little water to reach a desired consistency.

      Your dressing will last a few days refrigerated in a airtight container.

    My favorite way to enjoy this zesty dressing is drizzled over a salad with a few Gardein Seven Grain Crispy Tenders. (as pictured above) 

    Enjoy!

Saturday, July 8, 2017

Homemade Fruit & Veggie Washes!

I always try to make sure I carefully wash all produce that we eat. Especially store-bought produce, even if it is organic.  If you are like me, you don't trust most store bought washes.  Many have been found to contain chlorine and are not that effective.


These Homemade fruit and vegetable washes are great at removing dirt, bugs, dissolving pesticides and residue from your produce, as well as helping to extend the life of your foods.  They are also Natural, Chemical Free and Safe.


Fruit and Veggie Wash 1
  • Fill a large (clean) sink or bowl with water
  • Add 1 Cup of Distilled White Vinegar 
Let your produce soak up to 30 minutes. Scrub with a veggie brush if necessary, then rinse produce thoroughly and allow to dry before storing in refrigerator.


Fruit and Veggie Wash 2
  • Fill a large (clean) sink or bowl with water
  • Add 1/4 Cup Hydrogen Peroxide
Let your produce soak up to 15 minutes. Scrub with a veggie brush if necessary, then rinse produce thoroughly and allow to dry before storing in refrigerator.


When washing leafy greens make sure to rinse off all the pesky hidden dirt and insects that can be found in crevices.  A salad spinner works great for helping to dry your greens.


Enjoy!

Monday, February 27, 2017

Buffalo Cauliflower Sandwich!

I have always loved buffalo anything! My husband and I have been making Buffalo Cauliflower Bites, both battered and just roasted, for sometime now. What's better than a buffalo bite? A whole buffalo sandwich, of course!

What you need
1 head of Cauliflower
2 Sandwich Rolls
1 Red Onion, sliced
1 large Tomato, sliced
Lettuce
*optional* Vegan Ranch

Batter Ingredients
2/3 Cup Flour
2/3 Cup Panko Bread Crumbs
1Tbsp Onion Powder
1Tbsp Paprika
1Tbsp Garlic Powder
1tsp Kosher Salt
1tsp Cracked Pepper
2/3-3/4 Cup Cashew Milk or other plant milk


Buffalo Sauce
1 Tablespoon Earth Balance or other Vegan butter substitute (Melted)
1/2 cup Franks Red Hot or other Vegan wing sauce


You will want to line a baking sheet with parchment paper and preheat your oven to 450 F (Tip: spray a light layer of olive oil or cooking spray to avoid sticking). Remove the greens from the base of the cauliflower while keeping the stems in tact.  Cut your head of cauliflower in half, and then cut a 1/2 inch "steak" from each side. You will only be able to get a few large steaks from one cauliflower, but save the leftover pieces and florets! You can batter, coat and cook them with the steaks to make buffalo bites, or use them in another recipe like Oven Roasted Cauliflower, or even juice them!


Mix all the batter ingredients but the Panko Bread Crumbs in a large bowl until well combined. Then slowly mix in the Panko. Submerge the steaks in the batter, you may want to use your hands to coat thoroughly in all their crevices.


Place the battered cauliflower on the coated, parchment lined baking sheet and bake for 40 mins at 450F.


While the steaks are cooking, whisk your melted vegan butter and hot sauce in a large bowl. After the 40 minutes, remove the cauliflower from the oven. Coat the cauliflower in the buffalo sauce. Then, place them back on the parchment lined baking sheet and bake for another 10 mins at 450F.

Now it's time to assemble your sandwich! Layer your roll your cauliflower, lettuce, tomato and onion. I also like to spread some delicious Vegan Ranch on both sides of my bun.

ENJOY!

Monday, February 20, 2017

The Best Damn Vegan Ranch!

Just because your Vegan doesn't mean you have to give up the delicious flavor of Ranch Dressing! There are many times that creamy and zesty flavor comes in handy, from salads to sandwiches! You would never know it's dairy free, and best of all it contains no additives and preservatives!


Vegan Ranch Dressing
  • 3/4 Cup Grapeseed Oil Veganise or other Vegan Mayo
  • 1.5 Tbsp Apple Cider Vinegar
  • 1/2tsp Onion Powder
  • 1/2tsp Garlic Powder
  • 1/4tsp Salt or to taste
  • 1/4tsp Fresh Ground Pepper or to taste
  • 1Tbsp Fresh Chives
  • 1Tbsp Fresh Dill

Finely chop the the fresh herbs and mix all of the ingredients in a small bowl 
Enjoy!


Thursday, December 10, 2015

Paleo Peanut Butter Cups!

This recipe for Paleo Peanut Butter Cups is super fast and easy to make.  They are a great snack for when you are craving something sweet. I have a huge sweet tooth and these hit the spot.  Ever since I was a kid I was obsessed with Resse's peanut butter cups. They were by all accounts my favorite food group.  These days I have adopted more of a clean eating lifestyle and stay away from highly processed foods and candy.  So with traditional Resse's being out I decided to create my own clean version of my favorite childhood treat.  They contain no hydrogenated oils or refined sugars, just natural clean ingredients.  This delicious snack only requires a few simple ingredients and about 10 minutes!  For more healthy snacks to help you get through the holiday season check out some of the ideas over at Nuts.com

Ingredients:

For my cups I used a small chocolate mold, you however can use a muffin tin or even an ice cube tray.


Directions:
  1. In a small bowl add your chocolate chips and microwave for 20-30 seconds or until melted.
  2.  Evenly divide the chocolate into your mold/tray
  3. In a small bowl place your almond butter, oil and honey, then microwave for about 30 seconds or until it's melted.
  4. Pour your almond butter mixture on top of each of the chocolate bottoms.
  5.  Place your mold/tin in the freezer for about an hour.
  6. When you take your cups out of freezer you may be able to just pop them out of your mold/tray.  If not carefully go around the edges with a knife and they will pop out.


ENJOY!


Saturday, October 31, 2015

Easy Homemade Apple Cider!

     
This is my simple recipe for homemade Apple Cider.  It's so easy, you make it in a crock pot! For this batch I used 6 apples of the same variety, but feel free to use a couple different types of apples if you want.  You can also mix together sweeter and tart varieties for a great flavor. You can also add a slice of orange for an unique citrus burst.   Besides being left with wonderfully delicious clean apple cider, making this will leave your home smelling amazing!


What you need: 
6 Apples
3 Cinnamon sticks or 2 Tbsp Ground Cinnamon
1 clove
1 tsp ground allspice
1 Tbsp Raw Honey


Quarter your apples and place all of your ingredients in your crock pot.  Then cover with filtered water.  Place the lid on top and set the crock pot to high.


After a three hours your apples will be soft, using a wooden spoon you can stir the apples to help them break down.  Mashing up the soft apples will help their flavor absorb into the cider.  Now let the mash simmer on high for another three hours.


Once your apples have fully broken down it's time to strain your cider.  I used my NUT BAG to strain my cider but you can use a fine mesh sieve or cheese cloth.  I first transferred my cider to a large measuring cup so it would be easier to strain.  You may also want to allow the cider to cool for about 20 minutes or pop it in the fridge for a few minutes since you will need to squeeze the mash and you don't want to burn your hands.


After removing the cinnamon sticks slowly pour your cider through your strainer over a large bowl, then begin to squeeze the liquid out of the mash. Continue to squeeze until all the liquid has been removed, you will be left with very little mash.


Now you have fresh homemade Apple Cider!


Since I use no processed sugars in my kitchen, this recipe only contains a small amount of raw honey. If you want want a completely sugar free cider you can omit the honey.  Apples are sweet on their own so your cider will still taste wonderfully. 

Now you can serve your apple cider! I prefer it warm but this cider taste great served warm or cold! You can store it in the fridge in an airtight container for about a week. I also add the cinnimon sticks back to the cider after I strain it.


ENJOY!

Saturday, October 24, 2015

Homemade Clean Apple Crisp!

Recently I have been overloaded with apples after an Apple Picking adventure, so I decided to create some new fall recipes.  First I took on the beloved Apple Crisp, or as some may refer to it, Apple Crumble.  At first I wasn't sure if I could create a Healthy Apple Crisp that would still taste great, so while I made my new creation I had my husband make a traditional apple crisp.  Once done we let our family be the judges!  Not only did everyone love my Apple Crisp, they actually preferred it to the traditional recipe.  Now, nothing against my husband's cooking skills, but I think the clean ingredients made the difference.  Below is my newest recipe for delicious Apple Crisp that is Gluten free, Grain Free, Dairy Free and contains no processed sugar!

For this recipe I used 6 apples of different varieties.  1 Jonathan, 1 Golden Delicious, 2 Red Delicious and 2 Cortland. I also did not peel the apples.  After Coring the apples I sliced them into small chucks and placed them in a medium sized mixing bowl.

  Filling:
  • 6 Apples
  • 2 Tsp Cinnamon 
  • 1 Tsp Lemon Juice
  • 2 Tsp Raw Honey
  • 1 Tsp Pure Maple Syrup 


 Combine all the filling ingredients in your bowl and stir until all the apples are evenly coated.


 Once your apples are coated spread them out into a large baking dish.


Topping:
  • 2 Cups Gluten Free Oats
  • 1 Cup  Almond Flour
  • 2 Tsp Cinnamon
  • 1 Tsp Salt
  • 1/2 Cup Ghee (Clarified Butter)
  • 1/4 Cup Raw Honey
  • 1/4 Cup Pure Maple Syrup


Combine all the ingredients for the topping in your bowl and stir until mixed.


Crumble the topping over your apples until evenly coated.


 Bake the Apple Crisp at 350' for 45 Minutes.


ENJOY!


Tuesday, October 20, 2015

How To Roast Pumkin Seeds!

I must admit, my favorite part about carving pumpkins is getting to roast and eat the seeds! They are so yummy and easy to make.  Below is my simple and easy recipe for making the perfect roasted pumpkin seeds.


What you need
  • 1 Medium Sized Pumpkin
  • Colander
  • Medium Bowl
  • Baking Sheet
  • Tin Foil
  • Paper Towel
Ingredients
  • 2 Tbsp Olive Oil  
  • 1/2 Tsp Kosher Salt
Empty the "guts" of your pumpkin into a colander.  Under cool running water clean the pumpkin seeds, removing any pumpkin pieces.  Once your seeds are clean, lay them out on a paper towel and pat them dry.  This will help them bake easier and more evenly.  Once you are done drying the seeds place them in a medium sized mixing bowl.


Add the Olive oil and Salt, then toss or stir until the seeds are evenly coated.

Once coated, evenly spread out your pumpkin seeds on a baking tray lined with tin foil.


Bake your seeds at 300'F for 40 minutes, stirring after 20 minutes, or until golden brown.


 ENJOY!

Tuesday, October 13, 2015

Homemade Clean Granola!

Yes its here! Another ridiculously easy and delicious clean recipe from my kitchen!  I love sprinkling granola on my yogurt in the morning or even as a snack, but I hate everything that is added to store bought granola. For instance preservatives, processed sugar, artificial coloring, corn syrup, Soy lecithin, hydrogenated oils, etc! Even the healthiest of store bought products contain some unwanted ingredients. For a while now I have been making my own granola at home and I love it! I know exactly what is in it and it is less expensive compared to store bought products.  I prefer a nut free granola, but this recipe can be adjusted to incorporate nuts, seeds and more.  I love this particular recipe because it is great for everyone.  It is gluten free, nut free, grain free and contains no processed sugars.


What you need:
Large Mixing Bowl
Large Baking Sheet
Parchment Paper
Spoon or Spatula


In a large mixing combine all your ingredients.

  • 3 Cups Gluten Free Rolled Oats
  • 1 Tbsp Coconut Oil or Grape Seed Oil
  • 1 Tsp Cinnamon
  • 1/4 Tsp Salt
  • 2-3 Tbsp Maple Syrup (depending on desired sweetness)
  • 2 Tbsp Raw Honey
  • 1 Tsp Pure Vanilla Extract
  • 2 Tbsp Flax Seed Meal 


Once your granola is evenly mixed spread it out evenly on a parchment lined baking sheet.  Bake at 300'F for 45 minutes, stirring after 30 minutes.


Again if you prefer you can add nuts, seeds, shredded coconut, whatever your heart desires!

Tip: If you have flax seeds you can grind them in a coffee grinder or small chopper to make flax seed meal.

 ENJOY!


Thursday, October 1, 2015

Guilt Free Chocolate Chunk Cookies!


There's nothing better then fresh chocolate chip cookies! Even if you eat clean you can indulge in these sweet treats.  My Paleo Chocolate Chunk Cookie recipe is so irresistible, everyone I know can't get enough and I am always asked to make them!  These cookies are grain free, dairy free and made without processed sugar.


What You Need
  • 3 Cups Blanched Almond Flour THIS is my favorite brand, it is the finest almond flour I have found and is great for baking!
  • 1/2 Cup Pure Maple Syrup
  • 1/2 Cup Unrefined Coconut Oil or Palm Shortening
  • 2 Eggs
  • 1 tsp Baking Soda
  • 1 tsp Kosher Salt
  • 1 tsp Pure Vanilla Extract
  • 1.5 Cups Enjoy Life Mega Chunks

  1.   Preheat the oven to 375'F
  2.  In a mixer combine your melted Coconut Oil, Maple Syrup, Eggs and Vanilla
  3.  While your mixer is on a low speed slowly add your dry ingredients
4.  Once the batter is combined stir in your Chocolate Chunks 
5. On a Silpat or Parchment Paper place balls of dough (I use a small ice cream scoop)

 6. Bake cookies for about 15 minutes or until golden brown


Serve your cookies with a glass of Fresh Homemade Almond Milk! 

Wednesday, September 23, 2015

FRIED GREEN TOMATOES!

Most people think of the movie when they hear Fried Green Tomatoes.  They are actually quite tasty and make for a delicious breakfast or anytime snack!  Since I use coconut flour in this recipe it's great for anyone who follows Whole 30, eats Paleo, Gluten Free or Clean. They are also easy and quick to make!


Ingredients:
3 Strips of Bacon
2 Large Green Tomatoes
2 Eggs
1/4 Cup Coconut Flour
1/2 Teaspoon Salt
1/2 Teaspoon Pepper


Prep:
1. Mix the coconut flour, salt and pepper in a shallow bowl.
2. In another bowl whip together your eggs.
3. You will want to slice your green tomatoes into slices about 1/8 of an inch thick.

Cook:
1. In a large skillet cook the bacon over medium heat.  Once the bacon is cooked put it aside to cool and keep the grease for cooking your tomatoes.
2. Dip your tomato in egg then dredge in coconut flour.
3. Over medium heat saute the tomatoes in your bacon grease for about two minutes on each side.
4. Crumble the bacon over the tomatoes and serve.

To add extra flavor to your Fried Green Tomatoes, sprinkle some cracked pepper before serving.

Have you ever tried Fried Green Tomatoes? 

Monday, August 31, 2015

Homemade Hummus Recipe!

For the longest time I have believed I didn't like hummus, as it turns out I don't like store bought hummus!  After I tasted my stepmother's hummus one day I couldn't get enough.  Ever since then I have been experimenting with crafting the best hummus recipe.  Here is my delicious recipe for  hummus that's flavorful with a tang!


Here is what you need:
2 13.5oz cans of Organic Garbanzo Beans (liquid from one)
1-1.5 Fresh Squeezed Lemons
1 Tbsp Tahini
1 Tbsp Liquid Aminos (you can substitute Tamari or Soy Sauce)
4 Garlic Cloves
1 Tbsp Fresh Oregano or 1 tsp dried
1 tsp Kosher Salt
1 tsp Fresh Cracked Pepper
(for a less zesty flavor you can use regular black pepper)


Place all of your ingredients including the liquid from one can of Garbanzo beans into a food processor or blander until smooth.  You can enjoy the hummus right away or refrigerate for a few hours for a richer flavor.

Enjoy!

Saturday, March 21, 2015

Simple Paleo Pesto!

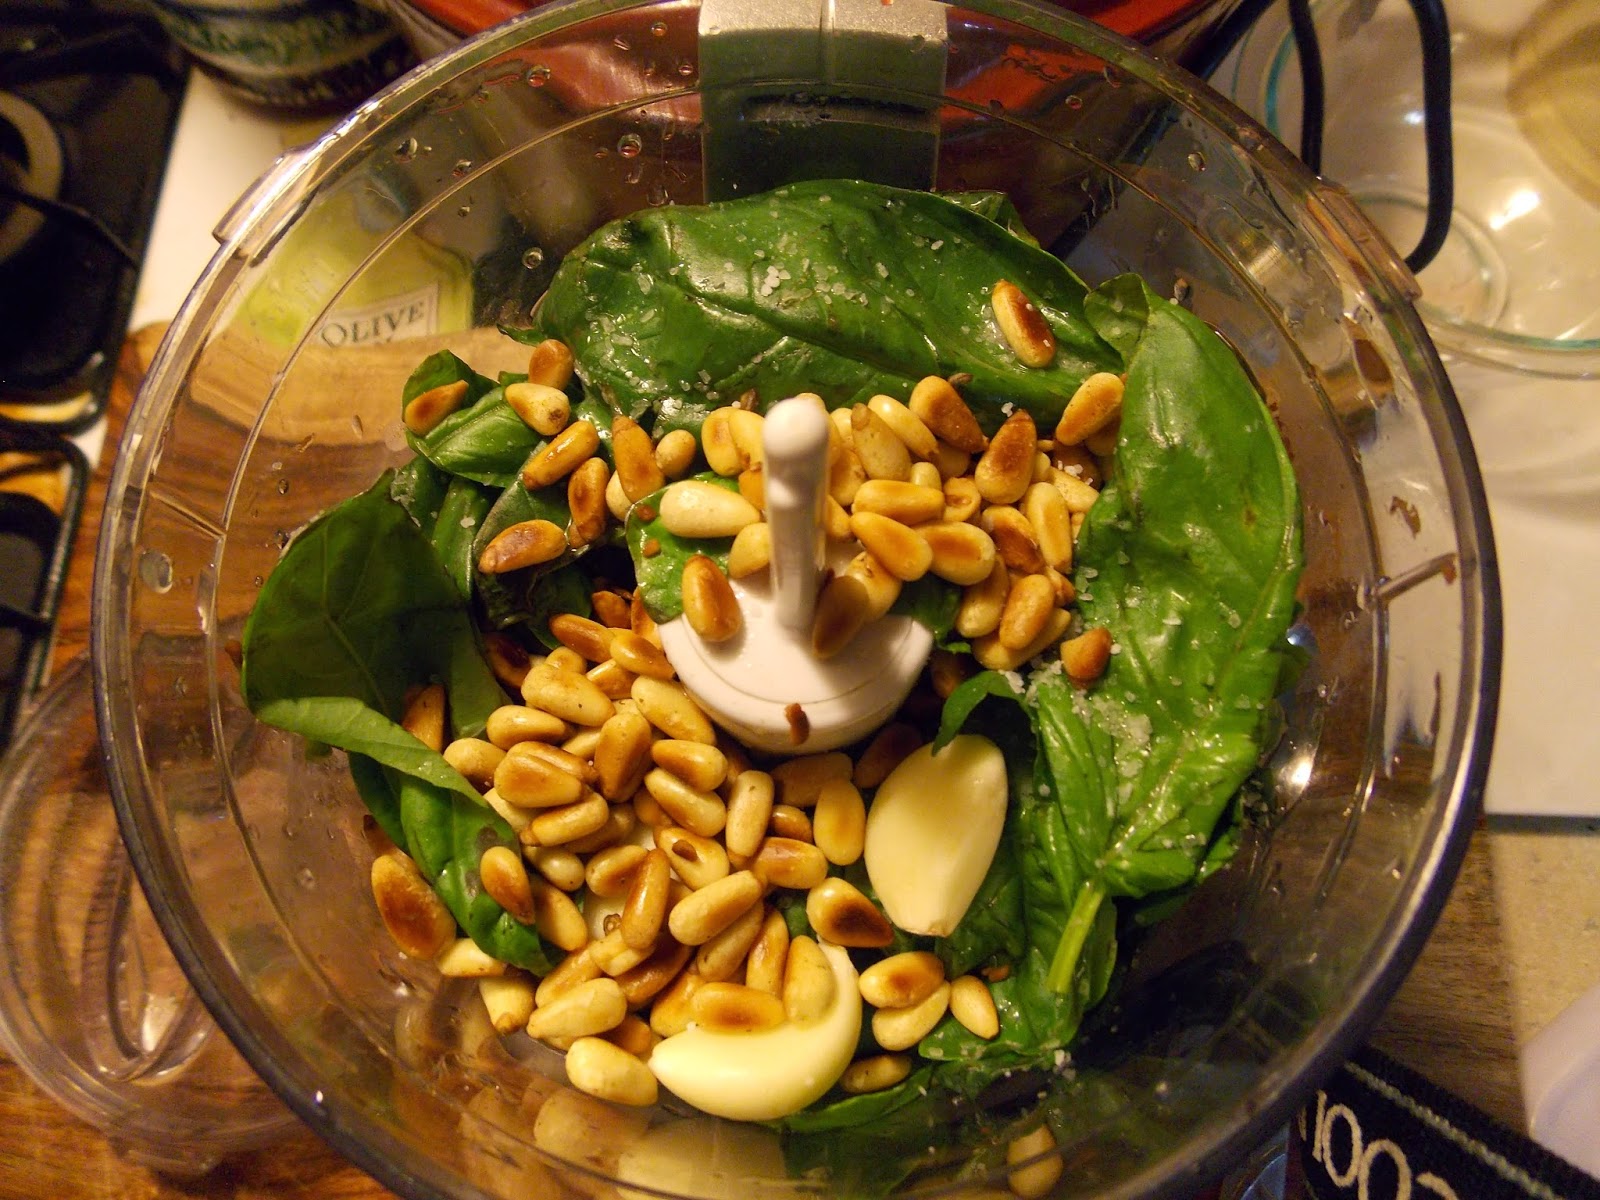
It's no secret I love pesto! As I try to avoid dairy these days I needed to re configure my pesto recipe to make it dairy free! Going into this I wasn't sure how it would taste or if I would even like pesto without my beloved fresh romano or parmesan cheese!!  I was delighted to realize I don't even miss it!! I absolutely love this new take on my pesto recipe, not only is it Paleo, it's also Vegan and Vegetarian as well, plus it tastes amazing!


1 cup fresh basil leaves
3 tablespoons toasted pine nuts
2-4 garlic cloves
1 teaspoon lemon juice
¼ teaspoon sea salt
3 tablespoons EVOO

As always I like recipes that are simple, quick and easy! 


To make the pesto you want to toast the pine nuts over low to medium heat for a few minutes to bring out their flavor. 


Put everything (except oil) in your food processor.


As it begins to mix slowly add in the oil 


Thats it! Now enjoy!


There are so many great uses for Pesto, for example, pesto linguini and shrimp, but tonight I used it to top off my dinner of organic red quinoa and chicken. Yum!


What is your favorite way to eat Pesto?